Lesson
These lessons are intended to reinforce the shape/color curriculum being covered at the preschool sites. Students will learn to identify shapes, colors, fruits, and vegetables, create pattern, develop fine motor skills through working with clay, and practice expressing ideas, talking to peers, respecting self/others, following directions and working together. For all of these lessons we plan to follow the site teacher’s classroom management strategies.
Ideas to Incorporate
- healthy eating
- shape and color identification
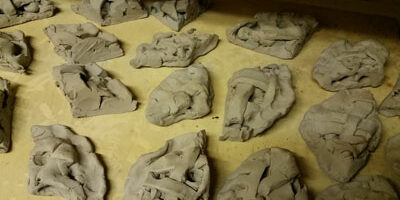
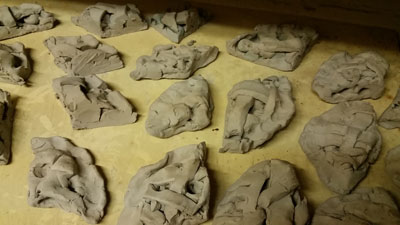
- experiential learning with clay
- using stamping techniques to create patterns
Clay Lessons
1) Making Clay Pizza Slices
(Identifying/Creating Shapes, fine motor skills, applying knowledge to new situations, Community/collaboration)
Materials
Clay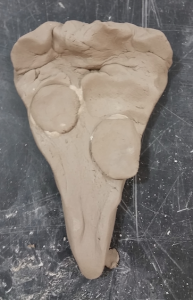
Directions
1. Practicing identifying shapes and colors.
2. Create Triangles for the body of slice, different shapes for toppings, cylinder for crust.
3. Discuss the steps it takes to make a pizza.
4. Discuss healthy options for pizzas (more vegetables, etc).
5. Demonstrate how the pizza slices can come together to make a whole pie.
2) Clay Pies- Group Project
(Collaboration, food, shape, texture, social connections, fine motor skills)
Materials
Clay
Directions
1. Divide students into groups of three.
2. Have one student roll out a crust for the bottom of the pie, one roll out a crust for the top of the pie, and one create fruit filling (sphere for berries).
3. Discuss the importance of working together.
4. Prompt students to discuss if they help make food at home.
5. Teach students to cut top crust into slices to be woven into the top crust, let them take turns cutting so everyone gets to try.
6. Lead students as they put the pieces together and teach them the proper way to attach clay pieces. (Place fruit topping on top of bottom crust, Pinch crust around the edges. Weave strips of crust together to create the top crust).
7. When the pie is complete, help students to cut the pie into three slices.
8. Discuss sharing and working together.
9. Discuss the differences in shapes (the pie is a circle when it is whole, and the slices are similar to triangles).
3) Square tile wall hanging with fruit and vegetable imprints
(Shape and Texture/Pattern; Creating/responding to texture, fine motor skills)
Materials
Clay
Stamps made from foods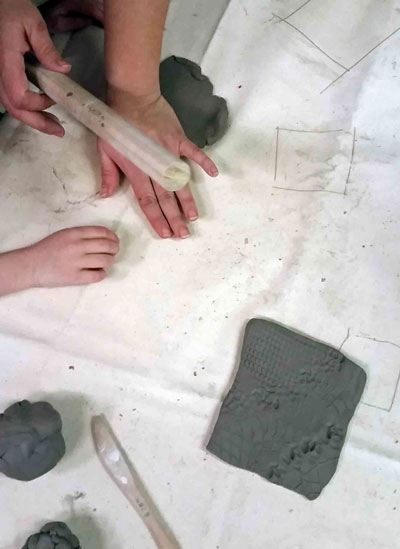
Directions
Create Texture:
1. Discuss properties of a square
2. Ask students for examples of squares that can be found in real life.
3. Teach students to create square tile.
4. Introduce the word texture- ask students to think of different examples
(What is something that is soft? Something scratchy? Something smooth?)
5. Create texture using stamps created from food (dried beans, rice, lentils, etc).
Respond to texture:
1. Introduce students to ways they can respond to texture, by rubbing crayons on paper over texture.
2. Use collographic texture plates with famous artworks on them.
3. Have students rub crayons on paper on top of plates to reveal image.
4. Explore different effects of using different coloring materials and different mark-making strategies.
* (Mark making is a term used to describe the different lines, patterns, and textures in an artwork. )
4)Texture Printed Slab Bowls
(Color mixing, gift-making, fine motor skills)
Materials
Clay
Stamps
Lace
Directions
1. As a class discuss shapes and the textures created the previous week.
2. As a class discuss what objects help you eat (silverware, plates, bowls, etc.)
3. Explain that people made these objects (each has a history!)
4. Demonstrate how to roll a slab, imprint texture, then drape over a paper bowl to create the form of a bowl.
5) Pinch Pot Animals
(fine motor skills, form, environment, relationships with animals)
Materials
Clay
Wooden clay tools
Directions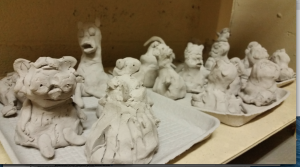
Pinch Pots:
1. Prompt students to discuss animals, where they have seen them, where they live, what they eat.
2. Prompt students to consider our relationships with these animals. (Are they wild? Are they pets? Do they live on a farm?)
3. Prompt students to choose an animal they like or have a connection with.
4. Introduce pinch pots.
5. Teach students to manipulate clay, combining two small pinch pots into animal figurines.
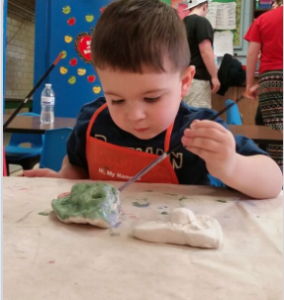
6) Glazing first two projects
(Color mixing, fine motor skills, properties of materials (clay and glaze), texture, communication, following directions)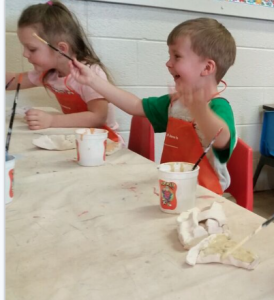
Directions
1. Begin with discussion- asking students what projects they made first, what the clay had felt like then.
2. Hand out projects- ask students to make observations about what it feels like now (hard!).
3. Point to different colors, ask students what foods/object
they could think of that were those colors.
4. Introduce directions for glazing.
Following directions was important for this process- students were asked to be careful handling their pieces, not to get paint on their neighbor, not tocontaminate shared glaze cups by keeping brushes for different colors separate. Glaze mixing could take place
on individual cups.
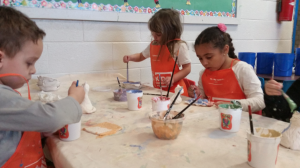
5. Have students glaze pieces and mix colors as needed.
6. Make suggestions but allow students to make their own decisions glazing.
7. Stimulate thought by asking students why they are painting something a particular color, provoke explanation.
7) Glazing second three projects
(Color mixing, fine motor skills, properties of materials (clay and glaze), texture, communication, following directions)
Glazing
1. Begin with discussion- asking students what projects they made first, what the clay had felt like then.
2. Hand out projects- ask students to make observations about what it feels like now (hard!).
3. Point to different colors, ask students what foods/objects they could think of that were those colors.
4. Introduce directions for glazing.
5. Following directions was important for this process- students were asked to be careful handling their pieces, not to get paint on their neighbor, not to contaminate shared glaze cups by keeping brushes for different colors separate. Glaze mixing could take place on individual cups.
6. Have students glaze pieces and mix colors as needed.
7. Make suggestions but allow students to make their own decisions glazing.
8. Stimulate thought by asking students why they are painting something a particular color, provoke explanation.
8) Crayon and Watercolor Resist Painting;
(Making Texture vs. Revealing Texture, material properties (wax/water interactions), color mixing, expressing ideas)
Materials
Watercolors
Crayons
Heavy Paper
Directions
1. Give students 3 pieces of paper and crayons.
2. Have students rub crayons on the papers against textured collographic plates of famous artworks.
3. Collect plates, then have students add their own imagery to the drawings.
4. Ask students what they expected to happen if we were to paint on top.
5. Explain that wax is resistant to water.
6. Have students explore painting with water colors on their drawings.
7. Hang paintings to dry – select two of the three to use for in the collage and book projects for the next two weeks.
9) Collage
(re-using materials, combining images, material manipulation (cutting, tearing, pasting), expressing ideas, applying knowledge)
Directions
1. Discuss how different ingredients come together to make a delicious dish.
2. Introduce collage.
3. Have students pick one of their resist paintings from the previous week to use for a new collage.
4. Ask students to collage their own dish, or if they have another idea they want to explore to create a collage about it.
5. Provide additional colored and textured papers to try.
6. Have students tear paper, arrange pieces, and glue them to construction paper.
7. Ask students about what they are making, encourage sharing with peers.
**During class- one teacher will interview each student to complete an artist statement.
10) Book-making, Artist Statements, and Art Show Set Up
(developing stories, creating images, sharing ideas, learning about presenting)
Materials
Paper
String
Staples
Crayons
Markers
Directions
1. Teach students to make a paper book using one of their watercolor resist paintings from two weeks prior.
2. Show students video of the Mouse and the Lion Story.
3. Have them draw to go along with each scene, or to create their own version of the story.
4. Play Aesop’s fables CD (by Richard Maltz) while students work to help stimulate ideas and create a relaxing environment.
5. Students will be asked about their work and to share with classmates at the end if they are comfortable.
6. If there is time students, may get into groups and act out their story.
7. While students are working on their books, teacher will prompt students to draw along with the story.
8. Teachers will work on setting up display of artwork.
9. Artwork will be arranged on tables, and parents will be invited to come see their children’s creations.
10. Students will be prompted to look at each other’s work and talk about what they have learned and what they want to make in the future.
11. Students will be given recipes for homemade clay and a link to the Creating Legacies Through Art, that they can take home to continue making art at home.